Building a GNS 430 Practice Station
A little box for getting faster with the GPS in my airplane
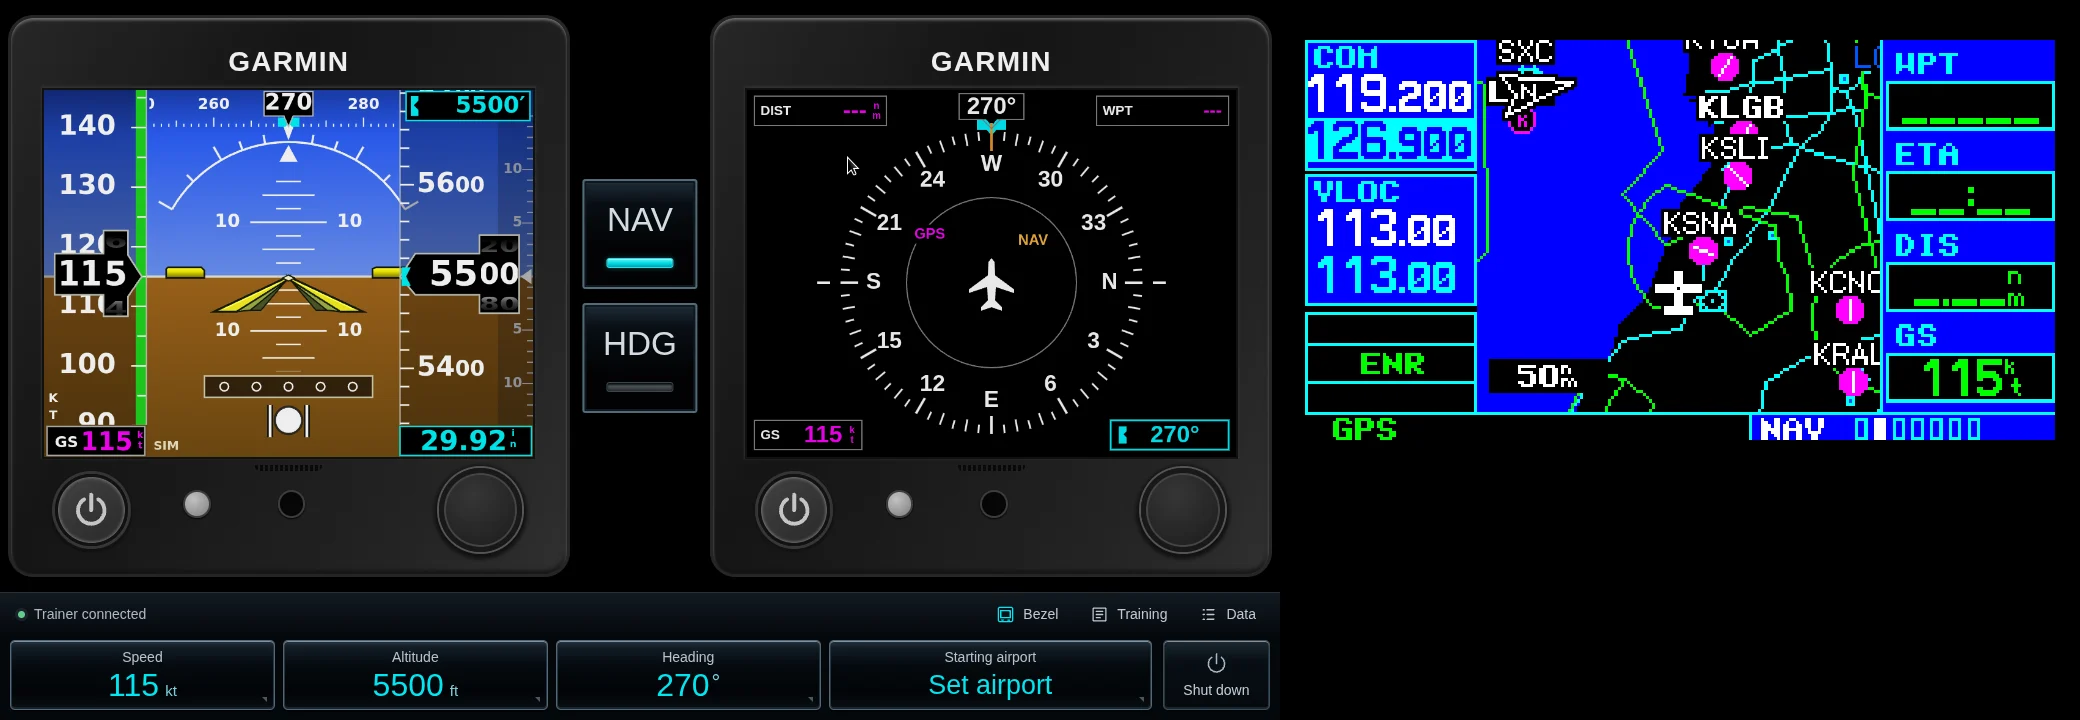
The idea
I've wanted a desk-sized GNS 430 trainer for about three years. I know how to tune frequencies. I want to get faster at editing flight plans, finding airport information, and recovering when I press the wrong button.
My airplane has the original non-WAAS 430. I had a RealSimGear unit with the physical knobs and buttons, and a Raspberry Pi 5 I could repurpose from a local language-model project. The plan was to connect them, add a seven-inch touchscreen for speed and altitude controls, and have it start when I turned on the power.
Running the old Garmin software
Garmin's 400 Series Simulator 5.01 came out in 2006. It's a 16-bit Windows program. Getting it onto an ARM-based Pi took an emulated x86 computer running Linux, with Wine inside that to run the trainer.
I tested the setup on my Mac before moving it to the Pi. The RealSimGear hardware uses USB for the controls and HDMI for its screen. An adapter reads the button and knob messages, sends them to the trainer, and puts the trainer's LCD image on the physical display.
Getting the knobs to work
Turning the large right knob should move one page group per click. Mine sometimes did nothing, then skipped a group on the next click.
The USB messages were fine. The first adapter turned them into mouse clicks on the trainer's knobs, but the trainer could process a click before updating its stored mouse position. Adding a delay helped in one test and failed when I tried the hardware again.
The fix was to use the trainer's keyboard controls for knob turns. A four-byte patch remapped the radio knob keys in a copy of the executable. After that, I could click through WPT, AUX, NRST, and back to NAV one step at a time.
The touchscreen
I wanted the touchscreen to look like the Garmin G5s. It now shows an attitude display and an HSI, with NAV and HDG buttons between them. I can tap a value and type a new speed, altitude, or heading.
A small library inside the Windows trainer reads its instrument data and accepts the touch controls. Loading it exposed a memory-allocation bug in the old instrument program, which needed a patch.
Then I noticed the HSI arrow pointing about 30 degrees away from the course I was flying. I suspected magnetic variation. The trainer had the correct GPS course, but its original HSI kept an older value in a display cache. Reading the current GPS course fixed the arrow.
The trainer doesn't provide pitch and bank through this interface, so those movements are estimates marked SIM. The speed tape uses ground speed. I left VOR and ILS simulation for later so I could start with VFR practice.
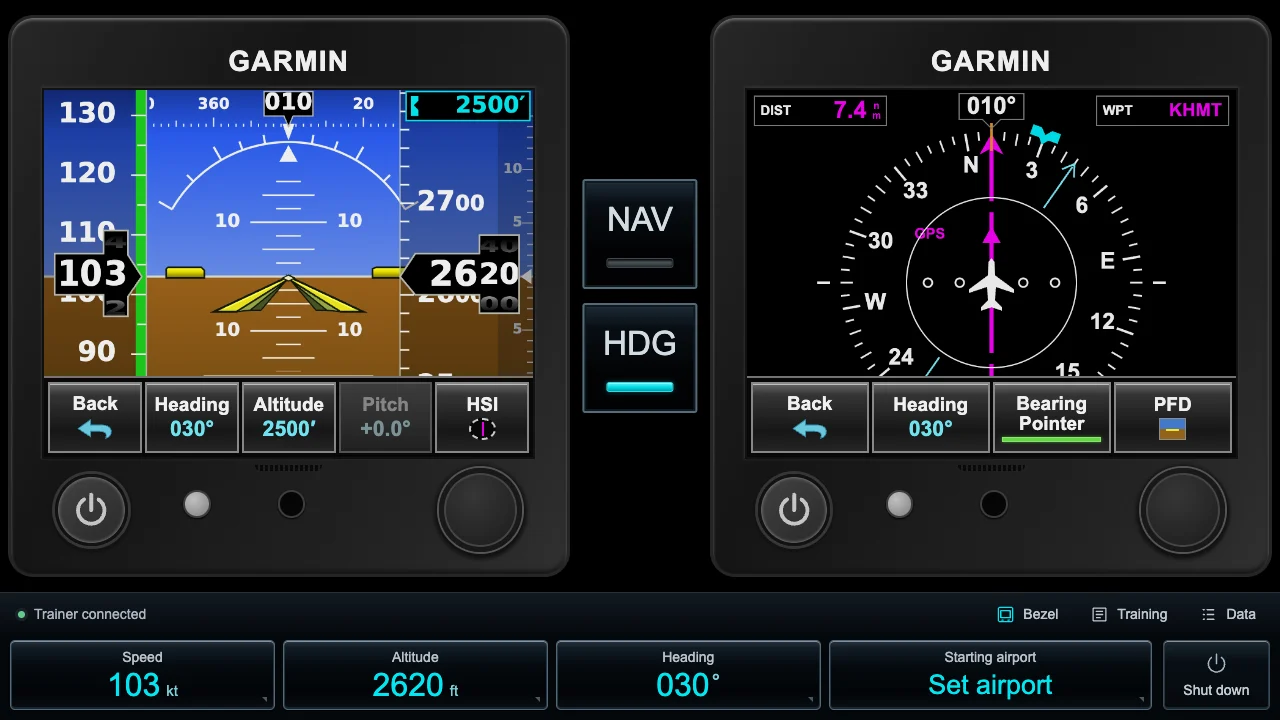
I can replace the attitude display with a training task and keep the HSI beside it. There are 18 VFR exercises to work through. The Pi now opens the simulator and touchscreen interface at startup, and I can shut it down from the touchscreen.
The printed stand
I put the 430 above the touchscreen because that's what I'm here to practice. The stand leans back ten degrees, with a wide base to resist movement when I turn the knobs. The front panel, base, and braces print as one piece.
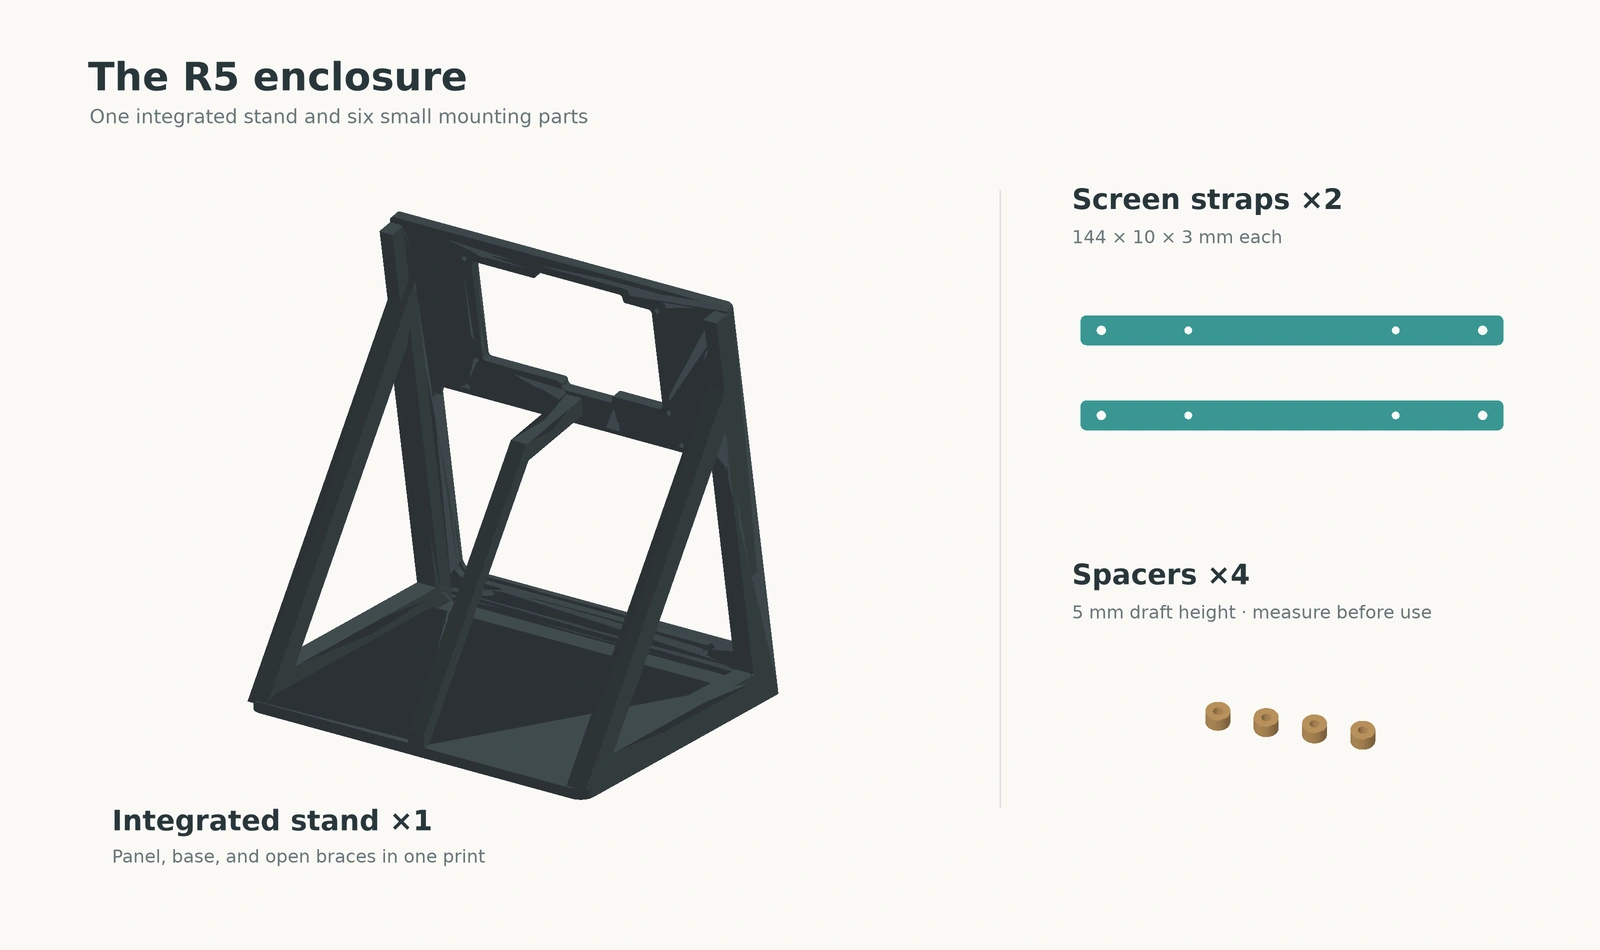
The open triangular sides save plastic and leave room to slide the display into place. A center brace adds support behind the panel. It starts as a straight pillar, then joins a 45-degree diagonal so I can print the stand face down without supports.
Two straps hold the touchscreen against the front lip, with spacers between the straps and the panel. The Pi mounts on the display's rear posts. I left the back open for cooling and access to the cables.
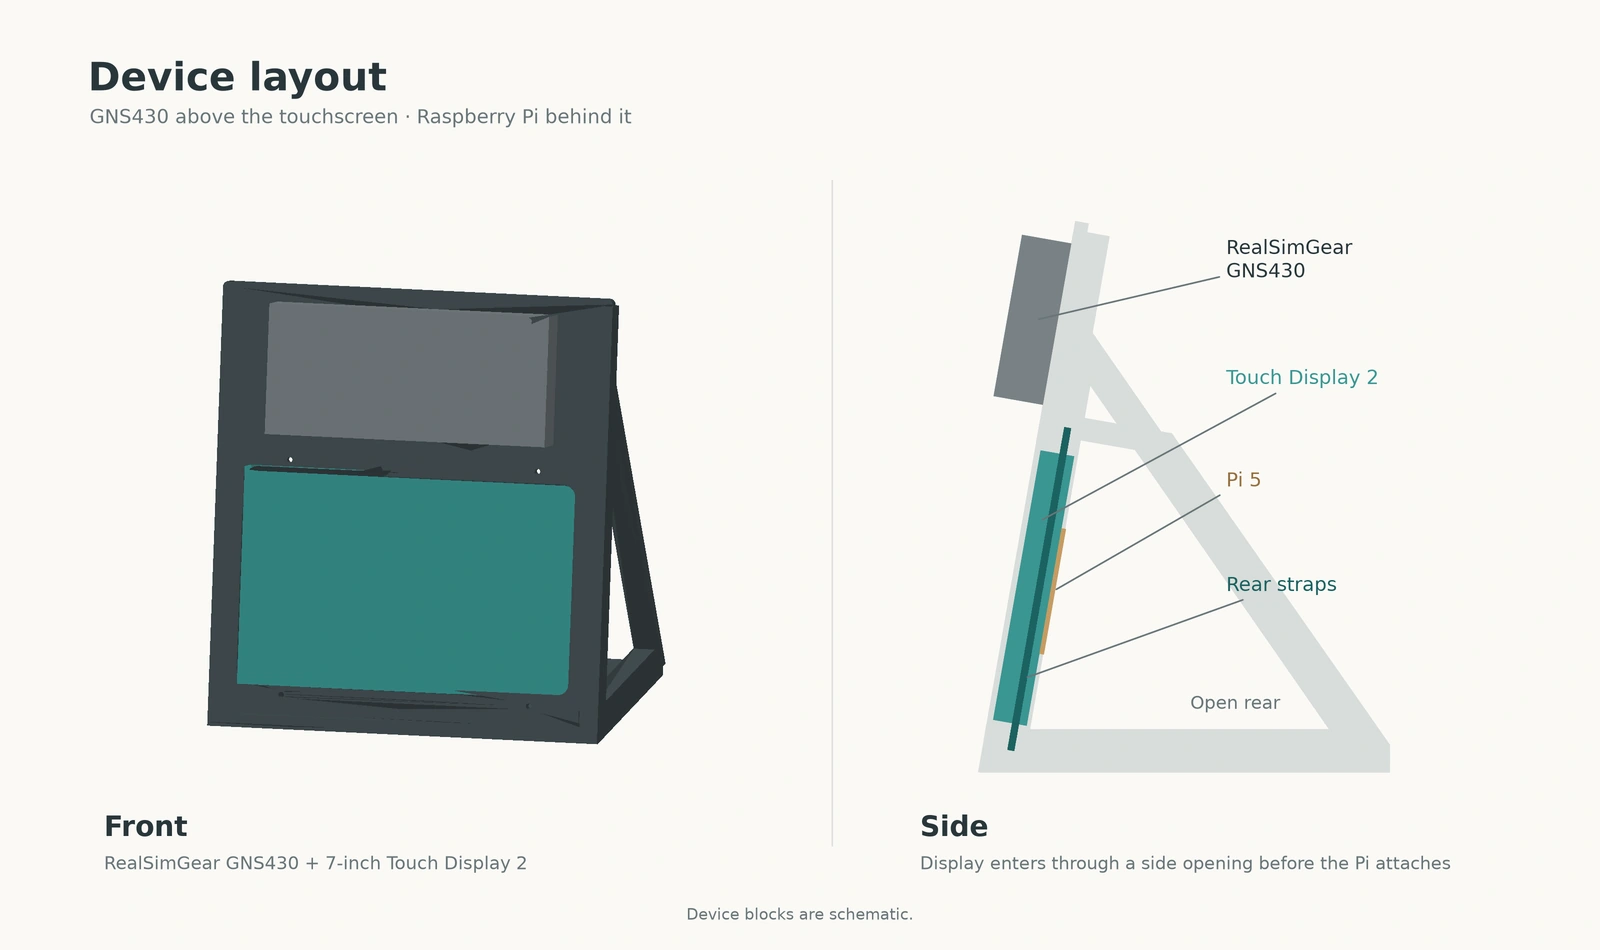
The stand fits the 256 mm printer bed. Bambu Studio estimates about eight hours and 384 grams of PLA. The stand is printed. Next I need to mount the hardware and check the fit and stability.